Hi,
Since some years, I got the plan to release a video about my way to prepare a G3 body. Laziness was stronger than me until today!
Frankly, penmodding is a difficult hobby with a ton of penmods tutorials. However, tutorials about preparing stuff to be modded could be counted on the fingers of one hand.
Indeed concerning the preparation of the G3 body, while we are using this pen since at least 2008, I only know 2 techniques that we can find on the Internet : the fast way and the slow way.
Oleg from psershop is showing on this video how to prepare very quickly the G3 body (starts at 28 secondes)
About the slow way (count 40 minutes to more than 1 hour if you are a beginner), Kota from JeB is explaining step by step in this Twitter thread. This way is great if you are a perfectionist.
The best method doesn’t exist, objectively. Choose the one you feel yourself the most comfortable with. This is the key of a successful prepared stuff. Do experiments, find out the best way for yourself !
Below is the video about my way to prepare G3 body. I usually need 15 minutes to do so.
I decided to not write steps on the video because I believe it is clear enough. Tough, I can explain you why I did it.
Explanation
I rarely need a whole uncut G3 grip. This is why I cut it in 3 parts.
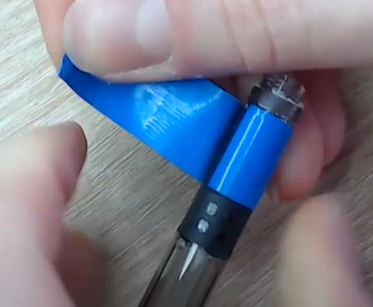
1- I cut and throw away the first stripe in order to have space and file the big plastic bump with a file. Before sanding, I protect the grip with electrical tape and the screw thread with teflon tape.

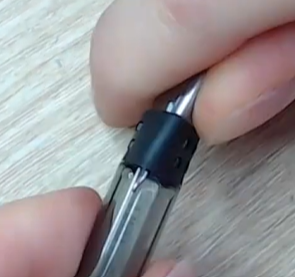
2- Once the plastic bump is sanded down, I cut the grip from the back to 9mm :
3- I remove the longest part with rough gloves. I can remove it fast and the part doesn’t stretch itself a lot by passing the sanded down bump. I often need it not stretched as a thin undergrip. (timecode 1:27)
4- I remove the 9mm part by stretching it with a thick needle. It is useful as a decoration grip, as Menowa did with his BT. It is fine stretching it since it is for putting it above a body or above a cap (timecode 1:40)
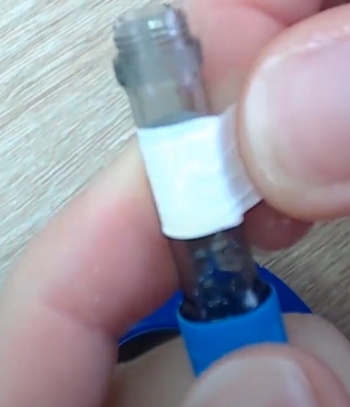
5- Once the square part is removed, I protect again the body with electrical and teflon tape. Teflon is great because it is thinner than electrical tape and it won’t bother while sanding with the file.
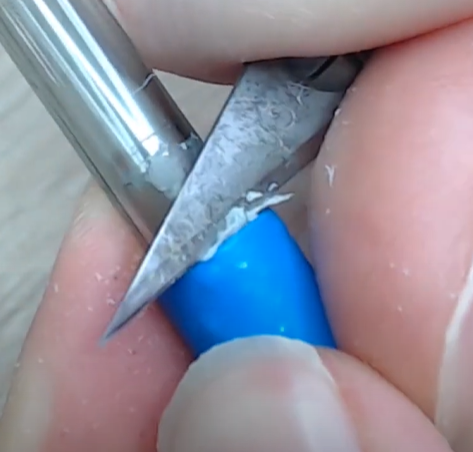
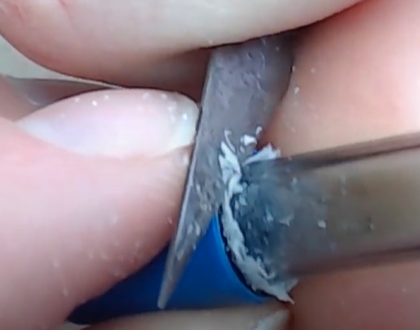
6- Below are dangerous steps, be extremely careful with your fingers please.
I finish the job by using the cutter. I remove the little bump between the front and the spinning area.
First step (timecode 2:40)
Second step (timecode 3:00)
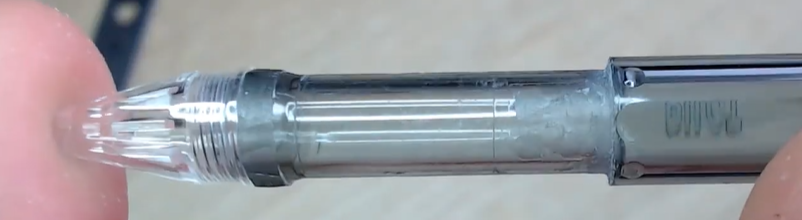
Final result, which I am satisfying enough with. I would sand down the bump more if the balance of the penmod need to be fixed.
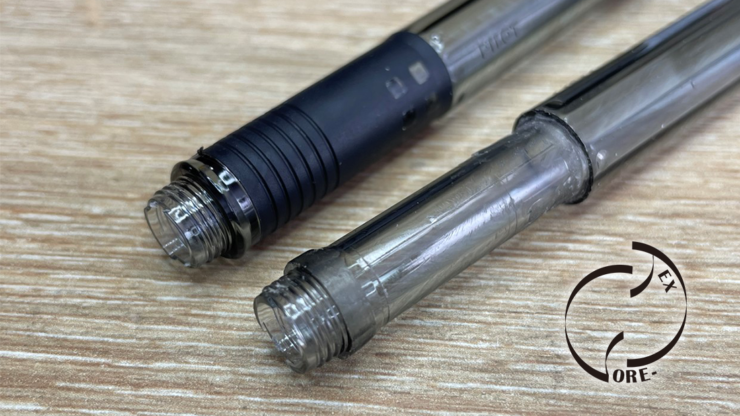
Comparison picture :

Thank you for reading !